Benefits Of Laminate Flooring

How to Prevent & Repair Water Damage to Laminate Flooring

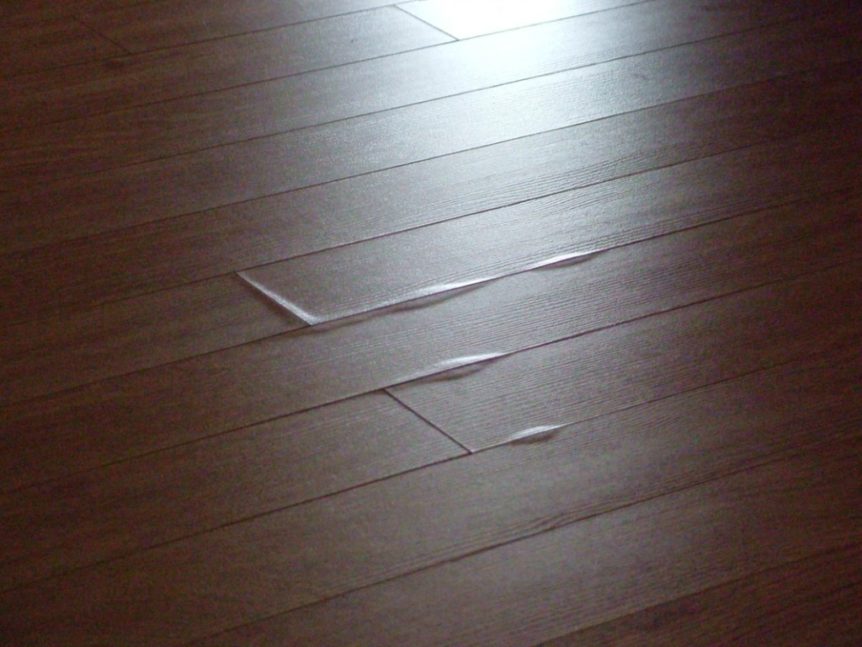
Who doesn’t love laminate flooring? We sure do! It looks great, is easy to clean, difficult to scratch, and won’t break the bank. It’s a versatile flooring option, and its popularity grows more each day. However, there is one small problem when it comes to water: if it’s exposed to too much water for too long, the boards will almost always begin to swell, cup, crown, buckle, crack, or split. No one wants to deal with that!

Here are a few things you can do to both prevent water damage to your lovely laminate.

  • Keep it away from water-prone areas. This includes areas of your home like bathrooms, kitchens, laundry rooms, mud rooms, and basements. Any room that has a major source of water in it is probably not the best option for laminate floors. Install vinyl flooring in these areas of your home instead – it’s 100% moisture-resistant!
  • Wipe up spills immediately. This is probably the best way to prevent water damage. Use the proper methods for cleaning up different kinds of spills to not only prevent your floors from being damaged, but also to keep them looking their best.
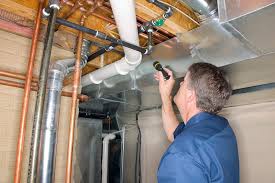
  • Basic home maintenance. Once every few months, do a quick checkup on your appliances to make sure they’re functioning properly and aren’t leaking. Check under sinks, behind toilets, and around water heaters for any signs of potential problems.

And if your laminate has already suffered, here are a few tips to get your floors looking as good as new!

  • Locate the source of the water damage. Not all water damage is caused by leaks, but if that’s the cause of your floor’s damage, it’s best to locate and stop the leak in its tracks. This may require you to shut off the water supply or fix a broken pipe, toilet, or appliance. Prevent your floor from suffering any more damage than it already has!
  • Pry up damaged boards. This may be a given, but make sure you note the planks that have taken on the most damage. Then, if you’re ready to replace them, pry the planks up using a circular saw, crowbar, or other tool. It’s important to note that each board needs to be removed one at a time – don’t risk doing any further damage by trying to pry up multiple boards at once.
  • Have extra boards on hand. Unlike carpet which must be replaced entirely if it suffers major water damage, laminate flooring is comprised of planks that are easy to pop up and replace if the need arises. Have a few extra boards on hand if possible so that you can replace the damaged boards yourself. (Just make sure the subfloor is dry and free of any damage before you install the new plank!) If you don’t have extra boards, and you don’t know what style or color your specific laminate flooring is, pop out a plank and bring it to your local flooring store – they’ll be happy to help you find the same style, if not at least a close match.

Ways to Keep Your Laminate Floors in Good Condition

Many people choose to install laminate flooring when working on a home renovation. It has become a popular option among homeowners because of its affordability and durability. It also comes in a wide range of designs, which closely resemble hardwood, stone, granite and ceramic. Just like other types of floor finishes, laminate floors have to be maintained and protected to keep them in good condition. Here are some pieces of advice on how to care for your laminate floors.

Dry Cleaning

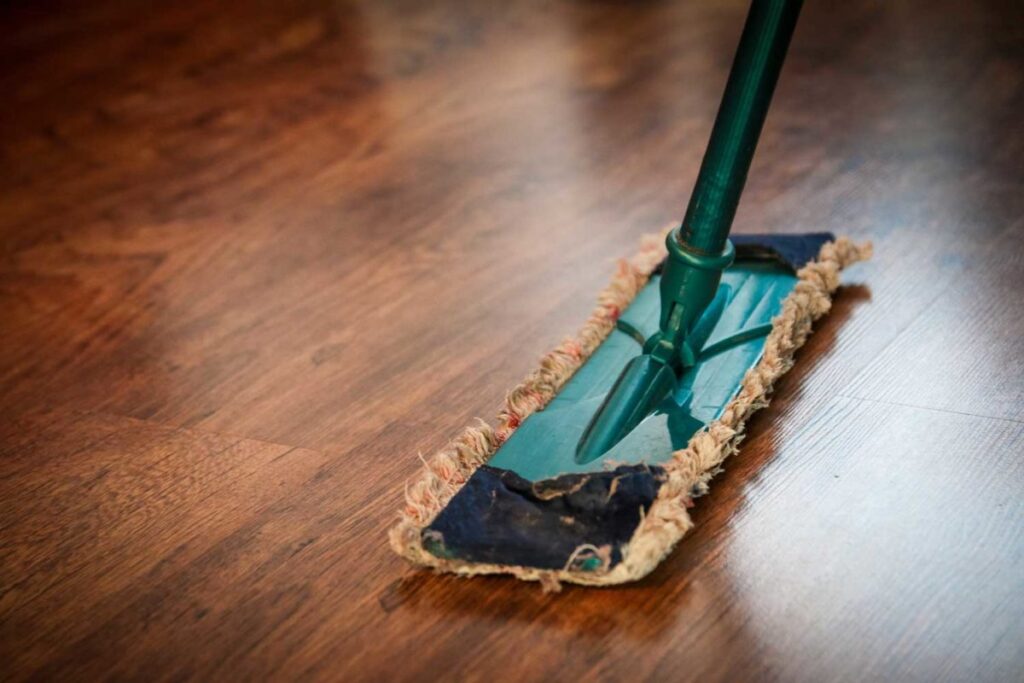
One simple way to keep your laminate spotless is by dry cleaning the whole area. You may use a vacuum cleaner, a cleaning rod with micro-fibre pads or a dry mop. Sweep the dust and small particles from the floor surface and make sure you move the furniture when cleaning. This will ensure that all the hidden debris is eliminated.

Thorough Cleaning

If you have a party at home, stains and spills are inevitable. In this case, a more thorough cleaning is required. You need to use a cleaning solution apart from plain water to remove tough dry stains and spills. If you don’t have any commercial floor cleaner available, a mixture of water and dishwashing liquid will suffice. Dampen your mop with your cleaning solution and wipe the entire floor area. Make sure you dry the surface right away as too much moisture can warp your floor.

Trimming Pet Nails

Many pet owners use laminate flooring because of its surface resistance. Although its aluminium oxide top coating can withstand normal wear and tear, it will still be helpful if you keep your pet’s nails trimmed to prevent your floor from gaining scratches.

Protection and Care

If you want to further increase the life of your flooring, you can use different accessories to protect the floor from getting damaged. Mats with a non-slip backing should be placed at the entry points of the house to ensure that the dirt from your footwear is not carried in. Adding rugs to floors can also beautify an area while keeping your floor protected. Installing felt pads underneath the legs of the furniture can also lessen the potential of floor damage.

Steps To Protect The Floor:

  • Before you can protect your laminate floor, the first step is to prepare the surface.  To do so, mist Laminator Plus Deep Scrub onto the floor and let it sit for 3-5 minutes.
  • Scrub into the floor with a damp sponge mop.
  • Press excess moisture from the sponge mop. Then use the mop to pick up remaining moisture from the floor.
  • Rinse the mop and repeat the clean water damp mopping process at least twice to ensure all Deep Scrub residue is gone.
  • Once the floor is dry, mist Laminator Plus Restore over the floor.
  • Use the microfiber mop to spread the Laminator Plus Restore over the floor in one direction.
  • Wait 20 minutes. Repeat if desired. Two coats will provide a satin shine, while three will finish the laminate to a high gloss.
  • For routine cleaning and maintenance, mist the floor with Laminator Plus Buff Dry Cleaner. Buff dry with a clean microfiber mop cloth.

Additional Tips and Advice

Do not pour water on laminate flooring. Do not allow moisture, even in small amounts, to remain on the floor, especially if the joints aren’t sealed. Floors will warp under contact with moisture and the only solution at that point is to replace them.

Pros and Cons of Laminate Flooring

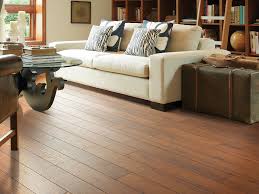
Laminate flooring offers the look of hardwood or stone flooring, but without the expense and required maintenance. Usually made from high-density fiber or wood particles, the flooring is topped with a laminate overlay that is designed to look like wood or stone. Then, a second clear, hard layer is placed on top of the overlay, giving the laminate its durability. Laminate flooring has become a popular way to update the look of a home.

Pros

  • Price and installation: Laminate flooring is cheaper and easier to install than hardwood flooring. Prices range from about $1.50 per sq. ft. to $3 per sq. ft, but you can find better deals from wholesalers and online distributors. Laminate flooring can be placed on top of almost any existing floor, excluding carpet, and several manufacturers offer a glue-free, tongue-and-groove system. The interlocking planks make it an easy installation for weekend warriors, and it can be uninstalled without damaging the laminate or the original flooring underneath.
  • Durability: Laminate flooring works well in high-traffic areas and homes with pets. It is scratch-resistant, durable and easy to clean. Just use a dust mop or a mop dampened with water. Plus, most manufacturers offer at least a 10-year warranty on their product.
  • Resale value: Laminate flooring can add to the resale value of your home. Most home buyers are looking for hardwood floors instead of carpet. Laminate gives you a wood look for less and can make your home look more open and modern. It also is environmentally friendly because it uses less wood–if any–in its construction.

Cons

  • Noise: Laminate flooring does not absorb sound well and can have a hollow sound when you walk on it, particularly in high heels. Using an acoustic underlay will help reduce the noise, but it still may be a nuisance. Laminate also lacks the visual warmth of other materials, including hardwood.
  • Buyers know it’s not hardwood: Although laminate floors will increase a home’s value compared to wall-to-wall carpeting, hardwood floors will increase it even more. Buyers generally can tell the difference between laminate and hardwood or stone, and they prefer natural materials.
  • Design options: Another drawback is that the look of the flooring is set by the manufacturer. Color and sheen cannot be customized, so choices are limited, and a buyer may not like your selection. Hardwood floors can be sanded and re-stained.
  • Warping: The materials in laminate flooring are moisture resistant, but the floors can warp in high-moisture areas. There is a debate over whether it should be installed in kitchens and bathrooms or other rooms that are exposed to heavy water or steam. Most manufacturers warn that laminate flooring will be damaged by standing pools of water. It is true of other materials as well, but hardwood floors may be able to be sanded and refinished. Laminate floors would have to be replaced. The material is still relatively new, so it isn’t clear how this type of flooring will hold up over time.

The Effects Of Weather On Your Flooring

If you have hardwood or laminate flooring then you may be surprised to hear that fluctuations in temperature can affect them.

These types of flooring are porous and expand and contract alongside changes in heat and humidity. If the weather is very warm we tend to turn on the air conditioning, if it is cold outside we tend to turn on the heating. Heat causes porous materials to expand, whilst cooler conditions cause them to contract.

Humidity can also adversely affect your hardwood and laminate floors. If the humidity levels in your home reach around sixty percent then moisture may seep into the floor boards and cause them to swell. In turn, this can result in boards warping, lifting, or cupping. When the humidity levels in your home decrease this swelling is then reduced. This cycle is repeated with each change in the seasons, causing repeated damaged as time goes on.

Fortunately, there are some steps that you can take to protect your laminate and hardwood flooring from fluctuations in temperature and humidity.

Make sure that you use minimal amounts of liquid when cleaning your flooring, and never mop hardwood or laminate floors with water. Also, don’t clean your floors with water-based products on a daily basis. All these steps will reduce the amount of humidity that your floors are exposed to.

Monitor the amount of humidity in your home. If humidity levels get to over sixty percent then use an air conditioner or dehumidifier to bring these levels down.

In general, the amount of moisture that your floors are subjected to, and the humidity in your home play an important role in keeping your hardwood and laminate floors looking their best. Keep both of these to a minimum and your flooring should look in tip top condition for many years to come.

Recommendations To Help Plan Your Wedding Videographer

The Complete Wedding Video Guide: Ideas, Tips, and More

The Characteristics Of Amazing Wedding Videos

Whichever type of wedding video you choose to go with, there are certain basic characteristics that you’ll want it to have. After all, whatever the style is, if the execution is sub-par, you won’t be happy with the end product.

  • The video must have amazing audio: This might seem like a given, but it’s often overlooked by amateur or novice videographers. The audio is a key part of any wedding video – if the audio is going to be bad you might as well just stick to photos.
  • It has caught all the traditional wedding shots: Few things are more frustrating in a wedding video than a key shot missing. The purpose of a wedding video is to retell the events of that one most special day in order and in style. If something is missing then that whole idea is pretty much ruined.
  • The camera is still throughout the entire video: Shaky camera work is great if that’s the style you’re going for but if not, then it can showcase poor quality and lack of expertise. If you’ve skipped on a professional videographer you might very well end up with that same quality as well. A good videographer, however, can make sure that every shot and every scene is done with a perfectly level and still camera.
  • It has enough B-roll: B-roll footage is both an editing nightmare and a blessing. It does take a lot of time to sift through but it gives the videographer enough footage to add details and style to the video and make it into something truly special.
  • Every shot is evenly exposed: Another annoying thing about poorly shot and edited wedding videos is the uneven exposure in consecutive shots. What this means is chaining very light scenes with poorly lit ones, just for an example. It simply makes for a bad video. To avoid that, good videography will plan all the footage ahead of time and will make sure that the exposure and lighting match perfectly.
  • The lighting is always perfect: Lighting must not only match from scene to scene, but it must also be objectively good. A wedding reception will include a lot of tricky lighting shots – some with very poor lighting, and others with too much of it. The videographer must always make sure that every shot and scene is perfectly lit for the best possible results.
  • Tells the story: It’s directed and edited to tell the story of the day in the best possible way. Even the best possible footage can be edited and strung together into a boring and uninteresting video. A lot of the work of the videographer gets done in the editing room after the wedding and it needs to be done expertly as well.

Wedding Video Tips and Tricks

If you would like to put your wedding on film without incurring too many costs, then you can make your own video. This is a possible option and is one that many couples have chosen in the past and present. With that in mind, we have collected a range of helpful advice that you can use to make your complete wedding videos as captivating as possible.

Do I Really Need a Videographer for my Wedding?

Even if you are going to take control of your wedding videos, it’s still important that you hire someone who can oversee the process. After all, it is your wedding day, so there will be a lot for you to think about beyond making videos. Therefore, you need to select a videographer. You can choose one of your guests to be the videographer, but you will need to make sure they have a decent camera to use. When you are thinking about this, here are some other options:

  • You can pay a college student to do the filming so that one of your guests does not have to do it and you can keep costs down.
  • You can allow guests to take their own footage so they can send it to you later. You can then package it all into a series of clips or a full movie.
  • You can use special techniques like drone wedding videography to do the filming from a distance. This would be an unforgettable way to record videos.

Questions To Ask Your Videographer

When you’re interviewing potential wedding videographers, make sure you know exactly what they offer. Here are a few questions you can ask before saying “I do” to your videographer.

  • Are you available on the date of our wedding?
  • Do you offer any packages? What’s included in your packages?
  • Have you worked with our photographer before?
  • How long will you be filming?
  • How many videographers will be there on the day of the wedding?
  • How long will the video be?
  • Will our video include audio?
  • How do you choose music for a wedding video?
  • When can we expect the video to be ready?

WEDDING VIDEO PRICES

Like many aspects of a wedding, there is a lot of variety in wedding videography pricing. Before you settle on a videographer, here are a few cost-related things to think about:

Set a budget: Before you start talking to a videographer, think about how much you can set aside for your wedding videography.

Ask about packages: Some videographers will give you a la carte pricing and others will have packages that can bring down costs.

Read over your contract: Make sure everything you want is included. Be very clear on what you’re getting. If it’s not in the contract, you can’t expect it on your wedding day.

Sign your contract quickly: Though you should take time to read it over, don’t wait too long to sign a great videographer! They might get snapped up by another couple.

Wedding Videography Checklist

Capturing the most important moments of your big day is a must. While it’s easy enough to preserve everything in wedding photographs, you may also want to hire a wedding videographer to help get those sentimental moments on film. If they are experienced with weddings, your videographer probably already knows the ins and outs of who and what to film. If you have any doubts, pass along this wedding videography checklist.

Remember that each and every wedding is different, so you may have more or less to get on film. As a rule of thumb, more is more. You can always dial back the number of shots when editing it together for the final cut.

Here is your go-to wedding videography checklist.

Pre-ceremony videography checklist

A lot happens before the bride and groom meet at the altar, and your videographer should be up to the task of getting all that prep work on film. You’ll want a medley of getting ready shots of both the bride and the groom, venue shots and arrival shots.

  • Bride/groom prep (shots of the couple getting ready pre-ceremony)
  • Wedding party prep (shots of the bridal party and groomsmen getting ready pre-ceremony)
  • Exterior of the ceremony venue
  • Landscape around venue (i.e. for a beach wedding, shots of water, sand, pebbles)
  • Interior of the ceremony venue
  • Guests arriving to the ceremony venue
  • Bridal party arriving at ceremony venue

Wedding ceremony videography checklist

Once everyone has made it to the venue, your videographer should make their way inside. You’ll want everything from your flower girls to your “I do’s” on film. Remember to point out key guests to your videographer, as you’ll probably want a few crowd shots as well.

  • Guests being escorted down the aisle
  • Decorations, including close ups
  • Musicians performing
  • Groom waiting at the alter
  • Mother of the bride
  • Bridal party walking down the aisle
  • Flower girl(s)
  • Processional
  • Vows
  • Exchanging of rings
  • The first kiss
  • Introduction as a married couple
  • Recessional
  • Bride and groom leaving the venue

Wedding reception videography checklist

Now it’s time for the party. There’s a lot of moving pieces, so make sure your videographer has a list of all the necessary shots. The cake cutting, the first dance, toasts and the bouquet toss are among the most important.

  • Exterior of the reception venue
  • Interior of the reception venue
  • Wedding reception decor
  • Table settings
  • Menu
  • Meal/Bar
  • Guests at the cocktail hour
  • Introduction of the bridal party
  • First dance
  • Bridal party dances
  • Blessing
  • Toasts
  • Cake cutting
  • Parent dances
  • Anniversary dance
  • Guests dancing
  • Bouquet
  • Garter
  • Last dance

Hiring a videographer

Professional wedding videography can ensure that every movement on your wedding day gets preserved in a beautiful, well-crafted video. But if you’re looking to hire a pro, there are a few things to consider.

SHOP AROUND

There are a lot of videographers, and when it comes to selecting one for your wedding, it pays to do research before you decide on one.

  • Get recommendations: Talk to friends and family and read online reviews to find good potential videographers.
  • Ask the pros: Find out who your photographer or wedding coordinator would recommend. If you have a videographer in mind, ask if they’ve worked with them in the past, and what they thought about their work.
  • Meet them in person: When you’re picking someone who’s going to play such an important role on your wedding day, it’s important that you trust them. An in-person meet can help you get a feel for their personality and trustworthiness.
  • Consider their style: Ask for a portfolio or for a sample wedding video so you can see the sort of product you can expect from them. You should also check their website and YouTube channel to see if their work matches your personal style.

Local Moving Services For Residential Moves

A brief guide on long-distance moving

Whether you’re moving long-distance, you can certainly benefit from some of our fantastic long-distance relocation tips. We can make it happen together, effectively and quickly. From the moment you find out you have an upcoming relocation, our movers will be there for you. And up until the day we deliver your belongings to your new home, you won’t have to worry about skipping a beat.

Tips from experienced professionals to help you prepare for long-distance moving

In case of some relocation situations, you can simply throw everything you own in your truck and hit the road. But long-distance moving, however, requires a lot more planning beforehand. Our following long distance-moving tips will help you not forget everything you need to do ahead of time. Just breathe, and take notes in order to have a successful move.

Stay on schedule

Tasks, like transferring utilities or installing them and enrolling in a new school, are time-sensitive. And you shouldn’t be scrambling to complete all the chores at the last minute. To keep yourself on track with remembering what you need to do and when try scheduling segments of time on your calendar. Create little appointments for moving-related tasks and set up reminders on your phone. If you implement this long-distance moving tip, you’ll never miss a beat of your schedule. You’ll be set for a stress-free move in no time!

Hire a reputable packing company for long-distance moving

After you have seen and compared a few moving companies and their in-home estimates, examine their prices. You’ll be much more certain that you are equipped with all the proper information in order to hire the most reputable and trustworthy moving company possible. Though affordability is an important part of this decision-making process, keep in mind that the cheapest option isn’t always the best. You don’t want to find yourself in the middle of a moving scam while you’re trying to move across the country.

Update important documents like your license

Changing your address requires updating your information in your driver’s license and registration and other important documents. Make sure to plan ahead and find out what info you’ll be needing to update when the time comes. Try to do this with plenty of time to spare before your long-distance moving day!

What Is a Local Moving Company?

Local moving companies differ from long-distance moving companies in two major ways.  First, they usually only deal with in-state moves.  Second, they are smaller, which can lead to a different moving experience.

In this article, we will discuss the basics of local, intrastate moving companies, so you know whether one is right for you.

Services

Local moving companies offer the same services as larger, interstate moving companies.  Services commonly include:

Packing

Loading

Driving

Storage

Unloading

The only limitation is local moving companies do not handle out-of-state moves.  The reason for this is most of them are only licensed to move people within that state and not in other states.

Pricing

Local moving companies don’t differ from national moving companies too much when it comes to pricing.  It’s possible to find a local company that is cheaper.  It’s also possible to find one that’s more expensive.

INTERSTATE MOVING AND STORAGE GUIDE

The moving process is difficult, especially if you are planning and preparing for an interstate move. Every long-distance move requires a lot of preparations and planning well in advance. You won’t be able to execute an interstate move on your own. Therefore, you should contact your professional moving company and schedule an appointment. However, we have prepared a useful interstate moving and storage guide.

INTERSTATE MOVING AND STORAGE GUIDE – USEFUL TIPS

Whether you are preparing for an interstate move, local one or you are moving over the seas, having a professional moving company by your side is highly recommended. A professional mover will always pack and relocate all your belongings fast and safely. However, in order to prepare for your upcoming relocation, you should follow this interstate moving and storage guide.

Create a list of your belongings

Find a reliable and professional mover

Interstate moving and storage guide – Avoid moving scams

Choose a good storage solution

Get professional packing services

Interstate moving and storage guide – Be ready for the move!

CREATE A LIST OF YOUR BELONGINGS

Creating a list of your belongings will make your relocation quicker and easier! This list will also be useful to your mover because they will be able to calculate the cost of your move. However, if you want to calculate the cost of your move on your own

FIND A RELIABLE AND PROFESSIONAL MOVER

Every professional and reliable moving company has a license and years of experience in the moving industry. They also have a wide pool of moving trucks, well-trained workers, polite and always ready to help customer service workers and so on. A professional moving company always has local moves in its portfolio. However, a reliable and trustworthy mover has plenty of moving services to offer.

Local Moving

can move your home across the street, across town or across the province. Redecorating, refinishing or re-carpeting your floors? We would be happy to come and help. We can pack, move, unpack and arrange any extra moving services that you require.

Local Moving Rates

Generally, local moves are charged by the hour and rates depend on the size of the van, the number of men required, plus the cost of additional services such as packing, storage, protecting your goods, etc. Charges are based on the actual time on the job plus the driving time between your residence and our office.

A well-equipped professional mover will save you time and money. Our moving consultants would be happy to visit your home to provide you with a detailed estimate of costs.

Arrangements for a local move should be made at least a week or two before moving day. Movers are usually booked to capacity during peak periods which include school holidays during the summer and at month ends. Please make arrangements as far in advance as possible during these periods.

Guide for moving

Whether you ask your family, neighbors, or a professional moving company, they will all tell you that moving is a difficult task to undergo. However, if you take the time to prepare yourself, you can make it much simpler and smoother. But for now, it is time to set aside the negative thoughts and focus on the task at hand. The top priority on your to-do list is to find and get moving estimates from top-rated moving companies

The job market is consistently strong, the education is excellent, and the nightlife and entertainment are top-notch. The annual income is above average, and the housing market is still more affordable than comparable cities. Beautiful evergreen forests surround the city, and on top of that, the residents are very environmentally friendly. These are just a few reasons why moving here is an amazing decision. In this article

As we mentioned before, relocating can be quite difficult, regardless if you’re moving a few blocks away, or to a different continent. However, it gets more stressful if you decide to do everything on your own. So now, you are probably trying to decide between doing all the packing and moving with the help of trained professionals.

First off, the whole relocation will be far more efficient, because the movers have plenty of experience under their belt. This eliminates some common moving expenses.  Hiring professional movers poses much less risk to your precious items. Just make sure that you find reliable movers in time. We recommend hiring a crew roughly one month before the moving day arrives

No matter where you’re moving, staying focused, and organized is your top priority. When you streamline and properly organize the entire relocation, you reduce the risk of making mistakes. The best way to accomplish this is by making a comprehensive moving checklist. Creating this list is fairly simple, however, you need to do it as soon as possible in order to secure smooth operation.

Affordable Divorce Lawyer

Key Questions to Ask your Divorce Attorney

Hiring a divorce lawyer is the same as hiring any other professional. You’ll want to get references from others if possible, and you should check the attorney’s credentials with the Nevada State Bar to be sure he or she is currently licensed and whether there are complaints filed against him or her. Also, check the attorney’s listing with the Better Business Bureau and if complaints were filed whether they were resolved satisfactorily. Also, you should ask the attorney or his case intake paralegal some questions about the legal experience of the attorney. Here are the most important ones to ask:

How many divorce cases of this type as this divorce attorney filed on behalf of clients?

The more of your type of divorce case the attorney has done, and the more recent the cases, the better job he or she will do with your divorce case. Divorce laws change on occasion so you want your attorney to be up on the latest changes in the law and to have recently been in front of the court on similar matters.

Has your attorney ever been divorced? Does he have children?

This actually makes a difference. A divorce attorney who has never felt the pain of going through the process of divorce may not empathize with your situation. A divorce attorney with personal divorce experience will understand the emotions you go through and will be more patient with you than a divorce lawyer who has just enjoyed the single life. After all, divorce attorneys are human beings too, breathing and bleeding like everyone else, and as we all know, nothing makes us more aware of the emotions that go along with life experiences than actually living through them.

What will be my estimated total fee?

Though an attorney is not always able to give you an exact total, he or she should be able to get fairly close barring any unforeseen circumstances, such as your spouse contesting the divorce and demanding much more than is reasonable (or if you kept things to yourself that you should have disclosed to your divorce lawyer which broadside him or her, a no-no!). The best thing, of course, is to retain an attorney with a flat fee for uncontested matters, and check that this same attorney charges reasonable fees in the event your uncontested divorce becomes contested. There are now many unbundled law firms that charge by the task which also lowers overall costs for you.

Have you handled cases like mine?

For instance, some cases have a unique component. Even seasoned attorneys can get caught up in a situation where they simply do not know the procedures or commonly practiced habits of a different sort of court like juvenile or criminal court.

What can I expect regarding billing statements and attorney fees?

While most attorneys cannot accurately predict what they will spend on a case from the very outset, the attorney should be willing to explain how their services are billed, how often they send out statements and what they expect regarding payment of their fees.

What about confidentiality?

You have a right to know who will be looking at your personal information and divorce file. Be sure to establish upfront who will have access and whether or not your access has limitations.

Should one of us move out of the home?

This is more of a personal issue. If the attorney feels both parties can act responsibly, they might recommend you both remain at home, especially if children are involved. If the divorce is contested, forcing your former spouse to move out might be in your best interest. If each party is living in separate quarters, the couple can avoid exacerbating existing issues.

What are the guidelines regarding communication with my spouse?

Be sure to find out exactly what you can and cannot say to your spouse about the divorce proceedings. Remember, client/attorney privilege laws won’t protect you in these circumstances. Disclosing confidential information could jeopardize your assets.

My Spouse Really Doesn’t Want To Get Divorced – What Are My Options?

If your partner is refusing to accept you want a divorce it’s likely you will need to seek professional help. Sometimes a partner will avoid signing the papers or even accepting receipt of them. A popular alternative is to engage the services of a process server, similar to a bailiff. The role of the process server is to hand deliver the divorce papers to your spouse without notice.

When the process server has identified and confirmed your spouse’s identity usually by photographic evidence or asking your spouse to confirm their name, the papers will be handed to them. The Process Server will then provide a statement of service which is submitted to the Court with an application for decree nisi to prove that your spouse has received the papers. Your divorce can then proceed without further input or consent from your spouse.

Should I write a will / rewrite my current will now or wait until after my divorce is finalised?

This is an important question to ask. Often people want to make a new Will when they separate because when they are still married, their spouse can have claims on their estate, even if they’re separated.

I don’t have the full picture regarding my spouse’s financial situation. Can they hide things from me?

There is always a possibility a spouse or ex-spouse will try hide some of their wealth. This is against the law and there have been high profile cases in the news where women have won a Supreme Court fight on the basis that their ex-husbands hadn’t declared their true worth at the time of divorce.

Will I need to appear in court?

If the divorce is uncontested, neither party will have to appear in court. If it’s a contested divorce, your attorney will likely state that your appearance is mandatory.

What will my lawyer charge in terms of fees?

The costs will likely vary based on whether the divorce is contested or not. Some attorneys will charge a flat fee, while others might charge an hourly fee. It’s well within your rights to see if you can negotiate a deal.

Should we consider any temporary court orders?

If you have any reason to believe your spouse will react adversely to a request for divorce, your attorney could ask the court for temporary orders during the proceedings, including a restraining order or a spousal/child support order. Sadly, the spouse requesting the divorce may be a risk of physical abuse if they serve the papers firsthand.

Posted inLegal

Tips To Minimize Your Risk As A Buyer By Finding The Right Electrical Home Inspections

Electrical Permit Basics

An electrical permit is required for most electrical work, whether you or your contractor is installing a new item or repairing or replacing an existing item. A permit is the first step in ensuring your installation conforms to safety codes and standards.

Who buys the permit?

Whoever is performing the electrical work is responsible to obtain a permit before starting the work. You cannot use a permit someone else has purchased. For example: Someone you’ve hired asks you to purchase a permit for the work they are doing on your property. This is against the law, and the permit is not valid.

You must request inspection prior to covering any electrical work, no later than 3 business days after completing the work or 1 business day after any part of the installation has been energized, whichever occurs first. Failure to request an inspection may result in civil penalties.

Certain projects do not require a permit. They include:

Travel trailers.

Plug-in household appliances.

The like-in-kind replacement of lamps; a single set of fuses; a single battery smaller than 150 amp hour; contactors, relays, timers, starters, circuit boards, or similar control components; one household appliance; circuit breakers; single-family residential luminaires; up to five snap switches, dimmers, receptacle outlets, thermostats, heating elements, luminaire ballasts with an exact same ballast; component(s) of electric signs, outline lighting, or skeleton neon tubing when replaced on-site by an appropriate electrical contractor and when the sign, outline lighting or skeleton neon tubing electrical system is not modified; one ten horsepower or smaller motor.

For the purposes of this section, “circuit breaker” means a circuit breaker that is used to provide overcurrent protection only for a branch circuit, as defined in NEC 100.

YOUR GUIDE TO THE NEW REGULATIONS FOR ELECTRICAL SAFETY STANDARDS

The new regulations will apply to new tenancies from 1 July 2020 and to existing tenancies from 1 April 2021. Landlords must have the electrical installations in their properties inspected and tested by a person who is “qualified and competent”, at least every five years. Landlords have to provide a copy of the electrical safety report to their tenants, and to their local authority if requested. Breaches of the regulations could result in financial penalties of up to $30,000.

Tenancies covered by the regulations

The new regulations will apply to new tenancies from 1 July 2020 and to existing tenancies from 1 April 2021, including assured shorthold tenancies, houses in multiple occupation (HMOs) and licences to occupy. Exceptions to the regulations include social housing, lodgers, those on a long lease of seven years or more, student halls of residence, hostels and refuges, care homes, hospitals and hospices, and other accommodation relating to healthcare provisions.

Legal obligations of landlords under the regulations

Landlords have a legal obligation to make sure the electrical installations in their rented properties are safe

Under the regulations, they must:

Ensure that national standards for electrical safety are met, which are set out in the 18th edition of the ‘Wiring Regulations’.

Ensure that electrical installations in their rented properties are inspected and tested by a qualified and competent person at least every five years.

Obtain a report from the person conducting the inspection and test which gives the results and sets a date for the next inspection and test.

Supply a copy of this report to the existing tenant within 28 days of the inspection and test, new tenants before they move into the premises and any prospective tenant within 28 days of receiving a request for the report.

Supply the local authority with a copy of this report within seven days of receiving a request for a copy.

Retain a copy of the report to give to the inspector and tester who will undertake the next inspection and test.

Where the report shows that remedial or further investigative work is necessary, complete this work within 28 days or any shorter period if specified as necessary in the report.

Supply written confirmation of the completion of the remedial works from the electrician to the tenant and the local authority within 28 days of completion.

Inspections and inspectors

Inspections will test the ‘fixed’ electrical parts of the property, like the wiring, the socket-outlets (plug sockets), the light fittings and the fuse box will be inspected. This includes permanently connected equipment such as showers and extractors. The regulations do not cover electrical appliances, only the fixed electrical installations

The inspector will check whether:

any electrical installations are overloaded

there are any potential electric shock risks and fire hazards

there is any defective electrical work

there is a lack of earthing or bonding – these are 2 ways of preventing electrical shocks that are built into electrical installations.

Electrical Inspections

The goal of the Electrical Inspection Bureau is to enforce the safe installation of electrical wiring and equipment and to avoid the danger of electrical shock and fire. Inspectors work in conjunction with electrical contractors and building owners to ensure all buildings meet

The Electrical Bureau is responsible for a variety of inspections. Our primary function is to inspect all electrical installations and to check that they are installed in an approved manner to ensure public safety. The Bureau responds to complaints of code violations and assures that they are corrected. We also conduct annual inspections of nursing homes, day care centers, electrical signs, and buildings defined as Public Places of Assembly. In addition, the Bureau inspects fire alarms, and life safety emergency systems in a variety of buildings and institutions, to ensure code compliance and safety.

Q: Can owners do their own electrical work?

A: No. Due to the potential for electric shock or fire hazard, only Electrical Contractors licensed by the City can perform electrical installations.

Q: Can an owner obtain an electrical permit?

A: The licensed electrical contractor completes the required permit application, along with the supervising electricians signature and license number.

Q: As a tenant, who do I call if I have electrical violations that the landlord will not repair?

A: Please give as much detailed information as possible, including a daytime phone number so that the inspector can contact you to arrange a date and time for an inspection

Assessments: Electrical

performs routine remote and physical inspections on electrical work and electrical equipment in commercial, industrial, or residential premises. Field Safety Representatives are primarily responsible for performing inspections on work completed by licensed contractors. If a safety officer has identified an aspect of your work that doesn’t comply with regulations, you must fix it and notify the safety officer with a declaration for assessment.

To request an assessment, complete our Electrical Contractor Authorization and Declaration Form. Once we receive your form, our safety officers will review the information and determine the appropriate next step, which can be one of the following options:

Waive the inspection: we accept the permit holder’s declaration of compliance and do not perform a remote or physical inspection. This means no inspection will be performed and no certificate of inspection will be issued.

Schedule a physical inspection: if a high hazard has been identified or is suspected, a safety officer will arrange to physically attend the site to perform the inspection. A certificate of inspection will be issued to the permit holder upon completion of the physical inspection.

Schedule a remote inspection:  a safety officer performs the inspection without physically attending the site. To carry out a remote inspection, they will request evidence of one or more of the information types listed below. Alternatively, you can contact your local safety officer to arrange a time to walk through the installation via live video conferencing tools. A certificate of inspection will be issued to the permit holder upon completion of the remote inspection.

Since every permit and assessment has its own unique considerations, we cannot advise exactly what evidence will be required prior to receiving a request for inspection (declaration form). However, there are certain things you might be able to expect.

When you should submit a declaration for assessment

Many projects are complex, and may experience safety hazards at different stages of work. Technical works with permit holders every step of the way to help ensure the work being done is safe and compliant with regulations. You should declare each stage of work mentioned below, if applicable to you.

You must not do any of the following unless the regulated work has been inspected or the inspection has been waived:

Conceal any portion of the rough wiring

Connect power to the electrical supply system

Work on the next phase of the electrical work if an inspection is required before proceeding

Project Guide For Electrical Work

This guide is intended to provide you an overview of the permitting process for the following areas of electrical work for the interior and exterior of your home:

New or relocated lights and outlets

Service upgrade

No permits are needed to replace like-for-like existing fixtures. For information on the permitting process for the installation of solar panels, see the project guide for solar panels. For information on lighted signs, see the guide for all signs.

Who Will Be Doing the Work?

Decide whether you plan to complete the project yourself or hire a licensed contractor to complete the job for you.

Do It Yourself

You may need to pass a Home owners exam  to demonstrate proficiency in specific trades in order to get a permit to do the work yourself. You will also need to meet a set of requirements established

Contractor

Use the Contractor license search to see if your contractor has obtained a contractor’s license from the City

Should You Get A Home Inspection

Home Inspection Study Guide

The home inspection exam consists of 190 multiple-choice questions. Approximately 90 percent of the exam is based on the components of a home inspection covered in the prelicense education.

These two administrative rules pertain to license renewal, and it is very important you are aware of renewal procedures.

When reading the statutes and administrative rules (excluding ARSD chapter 20:74:03), you may want to highlight the following areas:

Definitions

Who needs a home inspector license

Requirements to become licensed

Requirements to maintain the license (i.e. renewal procedures, ARSD 20:74:04:07 and ARSD 20:74:04:08)

Grounds for disciplinary action

The standards of practice

Once you have completed your highlighting, you need only study these particular areas for the exam. Be sure to review your course materials from your principles of home inspection course for the remaining 90 percent of the exam.

Home inspection report writing style guide

I participate in a lot of online discussions amongst home inspectors over how home inspection reports should be written. I’m pretty opinionated about this stuff, and so is everyone else Don’t I have awesome people on my team? When I tell other home inspectors about our style guide, the most common question I get is “can I see yours?”

I don’t have a whole lot of secrets. I share all of my inspection methods, tips, and tricks, but our internal report writing style guide has always felt like personal property. I’ve never wanted to share this document before, but the more I get to know my own company

Report Writing Style Guide

Always use complete sentences.

Avoid the use of “I recommend”; everything in the report is a recommendation, so beginning every other sentence with this phrase makes for a very repetitive-sounding report.  The same advice can be given with fewer words and less repetition.

Use past tense to describe conditions. This helps to create a more consistent report and implies that conditions may change.

Avoid the word “you”.  

Avoid the word “I”. The report isn’t about you.

Avoid the word “appeared”.  This is weak language that gives the appearance of uncertainty.

Avoid the word “evaluate.” We’re inspectors. Use the word “inspect”.

When describing the condition of components, make the component the subject of the sentence.

Should the Seller Be Present for a Home Inspection?

Almost all home purchase contracts include a home inspection clause. Buyers want to know everything about the property: and we mean everything. Homeowners shouldn’t be around for showings. It interferes with the buying process, and can curb interest.

Buyers Will Feel Like Guests If You’re There

A home inspection is where buyers learn about any major issues your home has, as well as another chance for buyers to picture themselves living there. But it’s hard to focus on the house when the current owner is hanging around. They’ll feel like a guest in a place they want to call home. This makes them less likely to engage with the home and the inspection.

They Need to Be Able to Ask Blunt Questions

Home buyers need to be able to ask blunt questions about the condition of your home. What’s the state of the foundation? How’s the roof?

Is this place worth the price?

When the seller is present, it can make the entire process a little awkward. After all, who wants to be critical of something if the owner is right there? There are a lot of emotions on both sides of this transaction: the last thing you want to do is create a situation where someone feels uncomfortable or upset.

How Often Do Home Sales Fall Through After Inspection?

Sometimes home sales fall through after an inspection. If you’re properly prepared, this is unlikely to happen to you. But some buyers get the final report and start to panic. In some cases, buyers may ask for a lower sale price to make up for problems. They could also request that pre-existing problems be fixed beforehand.

Get Your Own Home Inspection, and Use Home Inspection Guide

Home inspections can be especially hard on the sellers who aren’t aware of the problems before they list. You could be in for an unwelcome surprise. It’s important that you know exactly what home inspectors are going to be looking at when they evaluate your home.

Have a Place to Go During the Inspection

A home inspection takes about 3 hours to complete. If you don’t have a coffee shop on the corner of your block, you should have a plan. We recommend making this plan well in advance, especially for days when you’re with your whole family.

A Guide to The Home Inspection Process

The buyer’s home inspection typically needs to be completed within ten days of the Final Acceptance Date of the purchase agreement (refer to your Purchase Agreement). See our list of inspectors that we have worked with. These inspectors have repeatedly demonstrated to us that they provide quality, reputable services; however, you are free to use any inspector that you would like.

Types of Inspections

There are several types of inspections that may apply to the home/property that you are considering for purchase. The most common inspections include a home inspection and radon testing and also a well water test and septic inspection when applicable. There are other types of inspections/tests available; however, most are not very common in Minnesota such as a pest, mold, or lead

Is a Home Inspection Necessary?

Buying a house is serious business and will likely be the largest investment that you will ever make. It is important that you know as much as possible about the condition of a home and property before you purchase it. Having a home inspection performed will identify the condition of the home and property, minimize unexpected problems, and help you determine whether or not major repairs are necessary.

What Does a Home Inspection Include?

Although a “Home Inspection” is very thorough and includes a general inspection of all mechanicals, it does not include specialized inspections. You should ask your inspector if they are qualified/licensed/certified to perform the specialized inspections/services that you desire; and if so, what the costs/fees are.

How do I Choose a Home Inspector?

We have a list of inspectors that we have worked with and who have proven themselves; however, you are free to choose any home inspector that you would like. Here are some questions that you may want to ask potential inspectors before choosing one.

Are you licensed?

How many inspections have you performed?

Is this your full-time business or do you do this part time/on the side?

Can I attend the inspection?

Are you a member of a home inspector’s trade association?

Are you certified?

How much will the inspection cost?

What is included in the inspection?

Do you provide radon testing?

What type of inspection report can I expect?

Do you have a sample report for me to view?

When and how will I receive the inspection report?

A Complete Guide About Home Inspection

The home inspection determines living conditions in a house. It helps you know if there is an issue with the property or not? As a rule of thumb, there shall be an inspection before striking a deal. During the inspection, let licensed and trained officials examine the property and figure out if there is any structural or functional flaw in the house.

When exactly home inspection is required?

Here are some of the scenarios where home inspection is considered:

an inspection is conducted by the officials to determine if the house is worth living for and all the building protocols were followed during the construction or not? Officials pay in a personal visit to the house and perform a visual inspection. The process generally includes taking pictures and notes of the site. Based on that inspection, they prepare a final report which states the legality of the house.

Another purpose it serves is when home buyers plan to purchase a certain property. They ask trained officials to inspect the property on their behalf and let them know if there is any fundamental flaw in structure or if there is any maintenance work required at the property.

When listing agents bring a property in the market, they inspect a unit to determine the conditions of the house.

Usually, homeowners also schedule an inspection at regular intervals to get to know the current status of their house.

Potential tenants may also take advantage of these services and may get to know about the apartment in advance.

Cost to get a house inspected:

A home inspection provides you with valuable information. When you aim to strike a deal, it works in your best interests to have exact information about the building. However, it does not come free of cost. Though the cost of an inspection may vary from company to company, $300 is considered an average amount for a home inspection

How to find professionals for a home inspection?

Generally, people get to know about the best house inspector from their real estate agents or brokers. If you do not feel content with the name provided to you by your agent, you may ask your friends or family to recommend someone to you.

Another good source is to read reviews or feedback in online journals or websites.

Besides, you may also approach companies who give training to the house inspectors such as the National Association of Home Inspectors (NAHI) and the American Society of Home Inspectors (ASHI).

You should ask the following question before hiring a home inspector:

Qualification

Certifications

Working experience

Any previous house inspection report prepared by him.

How long does it take for inspection?

You shall expect it to take at least a couple of hours. It may take more time if the house is bigger than average or if you have asked for any additional service during the inspection. The process includes taking pictures, jotting down irregularities, and examining every area.

Tax Preparation Office

Tips for Choosing a Tax Preparer

Following these tips will help you weed out the fly-by-night preparers and zero in on the best tax professionals in your area.

You’re really organized and on top of things this tax season. Good for you! You received all your W-2s and 1099s, you collected all your financial statements and receipts, and now it’s time to find someone to prepare your tax return. But there’s one problem…you’re not quite sure how to go about choosing a tax preparer.

It goes without saying that you want someone who’s qualified. But how do you know? You want someone who’s honest and reliable, too. But, again, how do you know? The last thing you want to do is search online for “tax preparers near me” and randomly pick a preparer from the list, but sometimes it feels like there’s no better way.

Relax. There is a better way. Follow these tips for picking a tax preparer to help you weed out the fly-by-night preparers and zero in on the best tax professionals in your area. With a little bit of time and a few targeted questions, you can find a competent and dependable preparer to complete and file your return.

Verify the Preparer’s Credentials

There are a lot of people out there claiming to be a “tax professional.” However, just because someone hangs out a shingle and advertises tax prep services, it doesn’t mean they actually have the skill, education, and expertise to handle your return.

To increase the odds of finding a qualified tax preparer, look for someone who is credentialed. You’re much more likely to get a competent preparer if they’ve been vetted by the IRS or a state regulatory board. The most common types of credentialed preparers are certified public accountants (CPAs), enrolled agents, attorneys, and annual filing season program participants.

CPAs are licensed by state boards of accountancy, studied accounting at a college or university, and have passed a rigorous exam. They must also satisfy ethical requirements and take continuing education classes to keep their license.

Enrolled agents are licensed by the IRS. They must pass a comprehensive exam, which requires them to demonstrate proficiency in federal tax return preparation, and complete 72 hours of continuing education classes every three years.

Attorneys are licensed and regulated by state courts and/or state bar associations. They graduated from law school and passed a bar exam. In addition, attorneys must also take continuing education classes and satisfy professional ethics requirements.

The IRS also runs a voluntary program that recognizes the efforts of return preparers who are not CPAs, enrolled agents, or attorneys. It will issue an Annual Filing Season Program Record of Completion to tax return preparers who obtain a certain number of continuing education hours for a specific tax year.

Ask about their service fees.

Avoid preparers who base their fee on a percentage of your refund or those who claim they can obtain larger refunds than other preparers. Also, always make sure any refund due is sent to you or deposited into an account in your name. Under no circumstances should all or part of your refund be directly deposited into a preparer’s bank account.

Ask if they offer electronic filing.

Any paid preparer who prepares and files more than 10 returns for clients must file the returns electronically, unless the client opts to file a paper return. More than 1 billion individual tax returns have been safely and securely processed since the debut of electronic filing in 1990. Make sure your preparer offers IRS e-file.

Make sure the tax preparer is accessible.

Make sure you will be able to contact the tax preparer after the return has been filed, even after the April due date, in case questions arise.

Interview tax preparers

Make sure a tax preparer has an active preparer tax identification number (PTIN) through the IRS and check whether the person meets state requirements.  Then interview the tax preparer thoroughly. Ask about fees, availability and what kinds of records the tax preparer will need.

Most tax preparers are legitimate and competent, but keep in mind that without a national license requirement, they may be working off of their own personal research and experience. Because of this, it is important you conduct a thorough interview with the tax preparer before you hire them.

Get trusted referrals

One of the best ways to find a tax preparer you trust is by asking friends and family for recommendations. That doesn’t mean you should hire your tax preparer sister-in-law just because she’s family, though. Before hiring any tax preparer, perform a BBB search for details on consumer reviews or complaints.

Review the entire return before signing. 

Before you sign your tax return, review it and ask questions. Make sure you understand everything and are comfortable with the accuracy of the return before you sign it.

Make sure the preparer signs and includes their PTIN. 

A paid preparer must sign the return and include their PTIN as required by law. The preparer must also give you a copy of the return.

Never sign a blank return.

Avoid a tax preparer that asks you to sign a blank tax form. Although this may seem convenient to help you file your return quicker, this is improper. A blank signed return sometimes also is a method which unscrupulous preparers use to cheat taxpayers by entering bogus expenses that create fraudulent refunds, refunds which the unscrupulous preparers then later misappropriate to themselves. Although such tax return-related scams by fraudulent preparers are relatively uncommon, they do occur, and taxpayers have a duty to guard themselves from falling victim to such schemes.

As one additional tip, be careful of offers from tax preparer firms to advance you money against an expected refund so that you can get your money faster. The fees associated with these loans or advances often are very high (even compared to regular credit card interest rates), and thus are not worth the small burden of waiting several additional weeks to receive the full refund. If you are concerned about getting a refund sooner, avoid the late rush and file as early as possible in the tax filing season, and consider using a tax preparer that uses E-file to expedite the filing of the return and the processing of your refund.

About Eye Care Routine

Types of vision tests: what do they measure?

Whether you have healthy or poor vision, it is important to see an eye doctor regularly for proper testing. The overall health of your vision will help your doctor determine when further intervention is necessary.

There are certain types of tests that are performed for everyone during a comprehensive eye examination, such as visual acuity testing. For some people with specific vision issues, additional testing may be performed, such as testing for color blindness. The doctor will begin by evaluating the state of your vision and eye health. From here, they can determine which tests are appropriate for your comprehensive eye examination.

The following types of tests highlight the wide variety of vision tests that are available.

Visual Acuity Testing

This type of test is done to determine how sharp your vision is. The doctor will usually have you look at an eye chart for this examination. They will ask you to read the numbers or letters that are present on a specific line.

In some cases, doctors give you a handheld chart. This one is used to determine how sharp your vision is close up.

Color Blindness Testing

The Ishihara Color Vision Test is the color blindness test that is the most widely used.

For this test, you are asked to look at a booklet. There will be dots of varying brightness, colors, and sizes. If you have normal color vision, you will be able to pick out the number that is present among the dots.

Ocular Motility Testing

This test is done to see if your eyes are moving as they should. It tests your ability to accurately focus on two separate objects and follow a moving object.

This test is important because if you have abnormal eye movements, you are at a higher risk for affected reading ability and eye strain.

Cover Test

This test allows doctors to determine your eye alignment. You will cover one eye and look across the room to see an object. This is also done on an object that is close to you.

During the test, the doctor is looking to see if you are showing symptoms of certain conditions, such as amblyopia or strabismus.

Retinoscopy

If you need a prescription for corrective lenses, a retinoscopy may be performed. The doctor is looking at the light reflection from your eye.

You will go into a dimmed room with the doctor. You will be asked to look at a specific letter on the eye chart. As you continue to stare at this letter, the doctor flips lenses and shines a light in front of your eyes. The purpose of this test is to get a lens power estimate for corrective lens prescriptions.

This test is ideal for people who are not able to sit up properly. It may also be helpful for babies and others who cannot raise their heads.

What are the most common types of eye defects

MYOPIA or NEARSHIGHTED

Myopia occurs when the eyeball is too long, relative to the focusing power of the cornea and lens of the eye. This causes light rays to focus at a point in front of the retina, rather than directly on its surface If you’re nearsighted, the first number (“sphere”) on your eyeglasses prescription will be preceded by a minus sign (–). The higher the number, the more nearsighted you are

HYPEROPIA or FARESIGHTED

This vision problem occurs when light rays entering the eye focus behind the retina, rather than directly on it. The eyeball of a farsighted person is shorter than normal

Farsightedness can be corrected with glasses to change the way light rays bend into the eyes. If your glasses begins with plus numbers, like +1.50, you are farsighted

ASTIGMATISM

Instead of the cornea having a symmetrically round shape (like a tennis ball), it is shaped more like a rugby ball, with one meridian being significantly more curved than the meridian perpendicular to it

Astigmatism usually causes vision to be blurred or distorted to some degree at all distances. Symptoms of uncorrected astigmatism are eye strain and headaches, especially after reading or other prolonged visual tasks

Astigmatism is usually combined with Myopia or Hyperopia

PRESBYOPIA

Presbyopia generally is believed to stem from a gradual thickening and loss of flexibility of the natural lens inside your eye

Presbyopia usually occurs beginning at around age 40, when people experience blurred near vision when reading, sewing or working at the computer. Everyone becomes presbyopic

Refractive Eye Surgery

Do you dream of seeing clearly without glasses? Surgery to reshape your cornea can correct nearsightedness, farsightedness, or astigmatism with a success rate of better than 90%. Surgery may not be right for you if you have severe dry eye, thin or oddly shaped corneas, or severe vision problems. Side effects include glare or sensitivity to light.

Glaucoma: View

You can’t feel it, but this disease damages your optic nerve. You may not have any symptoms until you lose your central vision. Your side vision will go first. That’s why you need regular eye exams every 1 to 2 years, especially after you turn 40. Doctors can treat glaucoma with medications or surgery.

Types of Color Blindness

Color blindness (also spelled colour blindness) or color vision deficiency (CVD) includes a wide range of causes and conditions and is actually quite complex. Usually when people talk about color blindness, they are referring to the most common forms of red-green color blindness, which are genetic conditions caused by a recessive gene on the X-chromosome, but there are other types as well.

Red-green color blindness can be broken down into two main types: Protan-type  (“pro-tan”), which is a disorder of the first “prot-” type of retinal cones also called the L-cones, and Deutan-type (“do-tan”) which is a disorder of the second type of retinal cone also called the M-cones.

Protan Color Blindness

Protan Color Blindness (“pro-tan”) is an anomaly of the “L” cones. The “L” stands for Long Wavelength Light, which is generally seen as red light, mainly responsible for seeing red colors. In Protan-type CVD, the spectral sensitivity of the L-cone is shifted toward shorter wavelengths, so that it does not receive enough red light, and receives too much green light compared to a normal L-cone. Protan-type CVD includes protanomaly, which is a partial shift of the L-cone, and protanopia, which is a complete shift of the L-cone. It is estimated that about 25% of cases of red-green color blindness are of the protan type.

A person with protan type color blindness tends to see greens, yellows, oranges, reds, and browns as being more similar shades of color than normal, especially in low light. A very common problem is that purple colors look more like blue. Another common issue is that pink colors appear to be gray, especially if the pink is a more reddish pink or salmon color. Another symptom specific to protan color vision deficiency is that red colors look darker than normal. For example, if red text is printed on a black background, it can be very hard to read because the red appears to be very dark.

Deutan Color Blindness

Deutan Color Blindness (“do-tan”) is an anomaly of the “M” cone. The “M” stands for Medium Wavelength Light, which is generally seen as green light. In Deutan-type CVD, the spectral sensitivity of the M-cone is shifted toward longer wavelengths so that it effectively receives too much red light and not enough green light.

A person with deutan color vision deficiency  may experience confusions between colors such as green and yellow, or blue and purple. Another common symptom is that green traffic signals appear to be a very pale green or sometimes white. Common color confusion also occurs between pink and gray or white, especially if the pink is similar to a light purple.

Tritan Color Blindness / Tritanomaly

Tritan Color Blindness (“try-tan”) includes tritanomaly and tritanopia. It is also sometimes called blue-yellow color blindness. Tritan color blindness most commonly acquired later in life due to aging of the eye or a medical condition such as glaucoma and is only very rarely inherited from birth. Tritan color vision is generally characterized by a reduced sensitivity in the blue-sensitive “S” cone cells. “S” stands for Short Wavelength Light. The retinal S-cone cells make up only about 1% of the approximately 6 million retinal cone cells, so when they are damaged or not functioning properly, it can easily cause a degradation to color vision. Typically a person with a tritan-type color vision deficiency does not see blue colors well, and may have difficulty seeing the difference between blue and green. Cataracts, glaucoma, and age-related macular degeneration can cause symptoms of tritan color blindness. Another factor that causes reduced sensitivity to blue is the yellowing of the crystalline lens within the eye: these cells do not regenerate and over a lifetime of exposure to light, especially UV light, the lens tends to become yellow in appearance and block the transmission of blue light, interfering with color vision. Eventually this yellowing also leads to cataracts that must be treated surgically.

Monochromacy and Achromatopsia

Monochromacy and Achromatopsia describes a range of conditions that include rod-Monochromacy, S-cone Monochromacy and Achromatopsia. Sometimes these are collectively referred to as types of achromatopsia, as the word “achromat” meaning “no color.” However, not all cases of achromatopsia have “no color” vision. Similar to other forms of color blindness, achromatopsia can be graded as incomplete (partial) achromatopsia or complete achromatopsia (total color blindness). Achromatopsia is often associated with light sensitivity, photophobia, and glare sensitivity. In some cases, low vision disorders such as progressive cone dystrophy or retinitis pigmentosa can cause a gradual deterioration of color vision that eventually turns into complete achromatopsia.

Trichromats, Dichromats, Monochromats are terms used in the vision science community to refer to different possible configurations of the human visual system having three (tri-), di (two) or one (mono) channel of color information. However, these terms are simplified to a great extent, because the true capability of a color vision system also depends on the degree of overlap between the channels, “perceptual noise” within the channels, and the cognitive processing capability for deciphering these signals in the visual cortex of the brain. Most cases of color blindness are considered anomalous trichromacy which means they are effectively operating at somewhere between trichromat (normal color vision with 3 channels) and dichromat (2 channels).

What are refractive errors?

Refractive errors are a type of vision problem that makes it hard to see clearly. They happen when the shape of your eye keeps light from focusing correctly on your retina (a light-sensitive layer of tissue in the back of your eye).

Refractive errors are the most common type of vision problem. More than 150 million Americans have a refractive error — but many don’t know that they could be seeing better. That’s why eye exams are so important.

If you have a refractive error, your eye doctor can prescribe eyeglasses or contact lenses to help you see clearly.

What are the symptoms of refractive errors?

The most common symptom is blurry vision. Other symptoms include:

  • Double vision
  • Hazy vision
  • Seeing a glare or halo around bright lights
  • Squinting
  • Headaches
  • Eye strain (when your eyes feel tired or sore)
  • Trouble focusing when reading or looking at a computer

What To Do If You Find A Bat On Your Property

How to Get Rid of Bats Naturally

So, you’re dealing with bats. And you need to get rid of bats. Fast. As scary as they may be, this is often due to the negative stereotype they have as portrayed by every horror movie, ever! Bats are actually pretty gentle creatures and are a necessary part of the ecosystem. They’re often endangered in many states and are protected, so killing them is not advised.

Typically, bats will give birth between May and July during the warmer months. In warmer climates, bats can give birth up to twice a year. When a female bat gets ready to give birth, she’ll find a place to hide and roost, which is typically where they become a pest.

Gestation for a bat takes up to 6 months, but for most species, this occurs much earlier. Bat pups are born as singular bats, though bat twins have been sighted. They reach maturity in just two months. Newborn bats can’t really fly nor do they have good control yet, so they’re often left in the roosting area while the mom gets food.

They’ll nurse up to five months in the roost, even though the bat pups can fly around a month after being born. Bats will then start to fly and forage their own food after a few months and return to the same nest afterward. The cycle repeats for next season. They’ve been getting a bad rep lately, but most bats will hide and fly away from danger rather than provoke it. We should respect them rather than exterminate them when possible.

Bat anatomy

Bats have fascinating anatomies nad have been the study for researchers for years now. Because of their lightweight, aerodynamic bodies, they’re able to detect, traverse, and fly around terrain at high speeds super efficiently and utilize echolocation for traveling in the dark.

Tips on How to Get Rid of Bats Fast

Bats play a vital role in the ecosystem as pest controllers and pollinators. But because bats pose a health risk through the potential transmission of zoonotic diseases, it is necessary to keep them away from humans. Learn how to get rid of bats effectively and humanely–sans the garlic.

Fill up holes and seal cracks

In the wild, bats like to hang out in caves during the day. In the absence of these caverns, they will take any dark space that gives them shelter and protection from predators. Given this, it’s easy to see why it is common to have bats in chimneys, bats in attics, bats in wall cracks, and bats in roof eaves.

If you get rid of possible entry points, that’s one less reason for bats to choose your home. This is the best way to prevent a bat infestation. However, if you already have bats in house, make sure none of them are trapped inside before you start filling up the holes.

Professionals typically fill up the hole with a metal mesh that is hard for animals to chew through, yet malleable enough to fit in crevices of different shapes and sizes. Stuf-fit Copper Mesh is a great option for this because it’s stain-proof, rust-proof, and chew-proof. After stuffing in the whole, use a foam sealant that expands to fill in the tiny holes in the mesh. Pur Black Foam is a popular option among pest and wildlife control companies.

Use a natural bat repeller

If you want to know how to deter bats in a simple, easy way, bat repellent sprays are a good option. These are made of synthetic chemical or natural ingredients that are unpleasant to bats. Bat spray can deter bats from nesting and deter bats from roosting when applied in strategic entry points, resting spots, and hollow spaces.

What It Takes to Get Rid of Bats

Bat infestation puts you in danger of more than mere odors. If you have these uninvited guests living on your roof, it is only a matter of time before their urine and droppings start posing serious health concerns. Besides health issues, but droppings and urine can destroy wood and other building materials; thus compromising the structural integrity of your home. If you have some bats living under your roof, you have every reason to act fast. Here is a guide on how to go about bat removal.

Bats are a protected species in most states. Thus, bat removal is often a controlled process that is governed by some law. You are advised against bat extermination of risk serious fines. This implies that you are legally mandated to use only humane ways to evict these unwanted guests. One human approach is to build a bat house and force them to relocate there.

Know the Species

After familiarizing yourself with local laws, you need to understand the type of bat species you are dealing with. This helps come up with a removal strategy that works for that specific species. Understanding the bat species will help you get a good idea of things like their maternity season. You do not have to wait until the mother gives birth.

Identify possible entry points

If you are sure that there are no babies inside, the next thing should be to identify all entry and exit points. This might require you to monitor your home during dusk or dawn closely. This can be quite challenging for an ordinary homeowner considering that bat colonies have multiple entry points and these entry points can be as small as half an inch.

Cover Each Opening and Clear the Mess

After identifying the entry points, the next move should be to cover them preferably with one-way exit valves. These valves allow bats to get out and deter them from regaining access. Once there are no bats inside, the next step should be to clean the droppings and urine in their wake.

How to get rid of Bats – A detailed guide

Nowadays, bats aren’t confined anymore to caves and forests. Instead, these creatures have now adapted to the slow spreading of urbanization amongst rural areas. They are nocturnal creatures, meaning that they only move around when the sun is down. Otherwise, they are to be seen sound asleep while upside down in dark places.

Because of their reluctance to sunlight, they are mostly found inside cold and hidden places. However, this is not only limited to the wilds. They can also convert any dark place that is not frequented by humans into their own homes. This is when they start to become pests.

The difficult part in having bats as pests in your house is the fact that they come across as scary for many due to the large amount of folklore that is negatively associated with them. After all, some thrive on blood for food, a fact which easily scares most people.

Bats

All over the world, there are about 980 species of bats. Out of all of these, about 40 species are found around the United States. They are mammals, which means that they are of the same class which dogs, cats, and humans belong in. They are mostly active during the night. They are not necessarily blind when the sun is out, however, during the night, they have to see using echolocation. Basically, whenever they make noises, they will determine how fast the sound vibrations return to their side which tells them how far something is in front of them.

What do they eat?

What propagates fear with bats is the fact that some of them feed on blood. There are only 3 species which does this, though. Most of them eat small insects, fruits, or fish. This is why they mostly frequent around forest areas. If one happens to be near your property, it means that there is a steady source of pests around your area

Step by Step Guide to Bat Removal

Though there are many different types of bat species noted in the United States, it is normally the bat types that live in colonies which are problems to homeowners. Though bats aren’t aggressive, they are considered a challenge when large colonies of them begin to live in buildings and the roofs in peoples’ homes. Their feces, better known as guano, accumulates very quickly and is a perfect place for Histoplasmosis to grow. Histoplasmosis is a fungus which humans can pick up by simply breathing that causes fungal diseases. The other potential problem with colonizing bats in the possibility of rabies that has been known to cause death in humans and pets.

Bats: Importance and Behavior

The more you know about bats before you attempt to remove them from your home, the better. Bat removal should be taken on by those who know what they are dealing with or professionals. Knowing their importance and behavior will help when it is time for them to be removed.

Bats are vital to our ecosystem, especially the colonies. These flying mammals eat incredible amounts of insects and can control large insect populations quite well. There are some bats that not only eat substantial amounts of bugs but also help with pollination and the dispersion of seed, which increases the number of plants that are essential food sources for humans and plant-eating animals.

Steps to Bat Removal

Investigation: We have already talked a little about the research above. But there are other things you should know about your bats as well. What type of bats do you have? How big are they? When do they give birth? This last question is crucial to know because the birthing season is the worse time to plan your exclusion process. It would be a disaster to have baby bats trapped in your home and the mothers caught outside. The chance of ending up with a significant amount of dead baby bats in your home creates a bigger job for you – not to mention the possibility of it being illegal as well as inhumane. Exclusions, therefore, should be done when the babies can fly.

Inspection:  Research the common entry points for bats into your home, and inspect them first. Vents and ridge caps are big on this list. Damaged areas, like missing boards or bricks and any small openings, are potential entries as well. Look for signs of bat excrement and check those areas. Roofs are excellent places to find entryways because they are well-situated for them to see when they are flying. If you are going to do this on your own, take the time to inspect your roof and chimney then fix what openings you can, making sure you leave their main entry open.

Set up your exclusion device: Buy the exclusion device that is best for your home, whether netting, funnels or cones. We don’t believe in killing the bats; we want them to live and do their job for the environment. Make sure you place them so that the bats can fly out of your home but not back in. Remember, this is best done at night when most of them are already out and eating. Whatever exclusion device you decide to use, do your research and make sure you set it up correctly as it is not as easy as it sounds.

Observe: Once you have set up your devices, take the time to watch and make sure they are working correctly. Setting up a one-way device means you need to make sure it is one way. If it seems like it is working well, leave it up for a few days to ensure all of the bats get out.

Check that the bats are gone: After a few days, check and make sure all of the bats have left. If this is the case, remove your exclusion devices and repair these openings and be sure sure that they are fixed correctly, as you don’t want the bats to return by finding a way back in nor to have to start the process all over again.

Clean up time: The bats were a problem but so is their guano. Once the bats are gone and can’t get back in, remove the guano and decontaminate the area. You need to remove the guano and thoroughly decontaminate the former nesting area. Bat guano can ruin your home structures as well as be a breeding ground for disease.

Bucket Truck Tires A Guide For Maintenance Safety

Lifted trucks problems and solutions: The good, the bad, & the lifted

Lifted trucks are cool. Sky-high trucks are even cooler. Driving a lifted truck makes you feel like king of the road. You can see above all those road logs hauling soccer families, and you are able to see that sport compact that wrecked with the big rig, far up ahead, way before you even get into the mix. Lifted trucks draw attention from everyone on the road and act as giant billboards at local shows, putting that paintjob high up in the sky for everyone to see. Tall trucks command respect on the open highway, and most people will get out of your way once they feel the heat of your headlights on the backs of their necks. Lifted trucks are also functional. They allow people to traverse rough terrain safely and take the occupants to places far from the city to enjoy places of calm. These purpose-built rigs are freedom machines.

But with that freedom comes some drawbacks that need to be addressed in order for a lifted truck to work reliably and effectively as a daily driver. How high should a daily driver be? Is it practical to drive a 16-inch lifted truck on the street? And if you are going to lift to the extreme, what can you do to make your driving experience a more livable one? We’ll show you some of the common problems associated with lifted trucks and throw a few solutions your way so you can determine if living with a towering four-wheeled high-rise is for you.

BRAKING

Problem:

Brakes are often one of the most overlooked upgrades when installing larger tires. The big meats that inevitably find their way onto a truck after a lift will compromise your stock braking system. The increased leverage of the bigger tires, along with the heavier rotating mass, will quickly overwhelm the stock system, leading to overheating, premature pad and rotor wear, increased stopping distance, and minimal, if any, reserve braking power when loaded down or towing.

Solution:

Fortunately, for those of us who love big trucks, there are many companies out there offering big-brake upgrade kits. These kits are meant for use with larger-diameter wheels, and include larger and thicker drilled or slotted rotors, high-performance brake pads, and multi-piston calipers. Big-brake kits have excellent pedal feel, offer improved reserve braking, and are resistant to fade-causing heat buildup. Companies such as Baer, Brembo, Stainless Steel Brakes, and Stillen have the most popular truck applications covered. Many kits will include longer stainless steel-braided brake lines that will account for the extra height and suspension travel of the lift kit. Stainless steel lines also improve braking performance by deforming less under heavy braking, and they will be more resistant to rupture.

HANDLING

Problem:

Once the truck is up in the air and outfitted with those aggressive off-road lugs, you will notice deterioration of on-street handling. But, the pavement-shunning donuts are not the only cause of sloppy steering. The vehicle may exhibit bumpsteer, wandering, and slowly react to the driver’s inputs. All of the symptoms can be traced back to two types of issues: steering system overburdened by the wheels, and tires or improper steering geometry.

Solution:

Sometimes custom steering, including equal length setups, is required to cure a lifted truck’s steering ills. But, even on the most basic live-axle truck, it is important for the tie rod to be parallel to the axle and the trac bar and Panhard bar to be parallel to each other. Sometimes, an extended heavy-duty pitman arm can be used to keep good steering geometry. With really big tires, the stock steering system may be woefully inadequate, and steering assist, such as a hydraulic ram, may be necessary to help turn the meats. We also recommend religious maintenance of wheel bearings, and the addition of steering stabilizers to keep the frontend working properly. It is important to remember that your 3-1/2-ton rolling barge is no longer as capable in emergency avoidance maneuvers as it was when it was stock, and is by no means a sportscar. Your driving style should be tailored accordingly.

RIDE AND SUSPENSION

Problem:

Many first-time lifted truck owners don’t realize the ride penalty in going high. Not all kits are created equal, and a rough-riding rig can add to fatigue on long trips, make controlling the vehicle exhausting, and put wear on the truck itself. Generic suspension tuning and low-quality shocks can lead to driveability issues, such as vibrations, axle hop, and loss of suspension damping, which would lead to a more serious problem. While on the subject of suspension lifts, torsion bar twisting is an inexpensive method many people use to lift their truck, which may be OK for leveling, but it is not a true lift because it merely adjusts the level at which the truck sits in its suspension travel. Therefore, tires that rub at stock height will still rub with a torsion twist somewhere in the suspension travel. Also, the higher you go with a twist, the less down travel you will have, causing quirky handling, such as skipping across the road imperfections, rather that soaking them up. On 4×4 vehicles, this also causes an issue because you could over-extend a CV axle joint on a truck that has excessive compression, but limited droop.

Solution:

Spring and shock technology has come a long way in recent years. Reservoir shocks and coilover shocks once reserved for high-end race trucks are now within reach of many truck builders. These damping units are easily tuned, adjustable for ride height (coilovers), and are readily available from many high-end shock suppliers, such as Bilstein, Fox, King, and Sway-A-Way. Custom leaf springs, tuned to your vehicle and your needs, can easily be purchased from Atlas, Deaver, or National, just to name a few quality companies. Traction bars that locate the axle to the frame to reduce unwanted movement and axle hop are another way to tame the wildness in your suspension.

What to Look For When Buying Lifted Trucks Used

Lifted trucks can be a great purchase for anyone in East Texas looking to do a little off-roading, interested in a higher clearance for rough roads, or in love with the look of a truck that literally overshadows the competition. When buying a lifted truck used, though, it’s important to look for a few critical details that can have a huge impact on the performance and longevity of the vehicle.

Check the DriveShaft

First off, whether it’s a spacer or a suspension lift, it’s incredibly important to check the driveshaft and rear transmission shaft to make sure that the new angle created by the lift kit hasn’t already put too much wear and tear on the steel. In some cases, it can cause failure in the driveshaft by way of bending or breaking the boot, making it leak grease and put serious pressure on the ball bearings within. If the truck you find seems to have a driveshaft and transmission in good shape, then it’s a sign that the lift kit hasn’t put too much wear on the important internals and it will probably be a good buy.

Properly Fitted Tires

The second, and one that should be easy to check with a glance, is checking that the tires are the right size and that they aren’t too worn down. Normally, you would want to fit bigger tires on a lifted truck so that it’s better at handling rough roads and the new center of gravity of the vehicle. Lifting a truck can cause wear on the tires more quickly and large wheels are going to be more expensive, so it’s a good idea to make sure that the tires are going to last a while once you drive your new ride off the lot.

Vehicle History Report

On top of that, if you can, get the repair history! Dealers will keep records of the work they’ve done to a vehicle to make sure it’s ready for test drives and new buyers, and seeing the maintenance record can give you a good idea about what’s already been done to the truck as well as what you might need to look into or keep an eye out for in the future. Getting this should be a quick and simple part of buying any used car, and getting it for a lifted truck will be even more important.

Other Modifications or Upgrades

The last step should lead you into a few things you can learn about a lifted truck that should excite you! New or upgraded suspension is a fantastic thing to see in a lifted truck since a big part of having one is being able to go places and do things that a car (or even a standard truck) wouldn’t be able to handle. Along with that, things like steps, new tires, or engine upgrades can be really exciting to see on a vehicle that you intend to use for tough roads and rough terrain.

Used lifted trucks in Longview, TX can be great buys for off-roaders, dirt road drivers, and anyone looking to drive home in something no one can ignore. With a few quick checks, you can be sure that what you buy is the absolute best deal you can find.

Can I use Passenger Tires on my truck or do I have to use Light Truck tires?

Many people are interested in using Passenger Tires because they’re less expensive than Light Truck tires and generally offer a smoother ride.

But again, it’s very important to remember the intended purpose of your vehicle. If you have a ¾-ton or 1-ton pickup truck, you need Light Truck tires, because they offer the proper load carrying capacity for your heavy vehicle and its cargo. Passenger tires simply aren’t built to handle the weight of large vehicles, and using them for this application could potentially be dangerous.

Some people ask us the opposite question – if they can put LT tires on their small SUV or pickup. This can also cause some issues. LT tires are built for heavy vehicles, so their stiffness can give your vehicle a harsh ride, and since they require higher tire pressure, they can throw off your vehicle’s TPMS (Tire Pressure Monitoring System, a safety feature that alerts you to improper pressure in your tires). For these reasons, we don’t recommend using LT tires if your vehicle doesn’t require them.

Pre-Winter Truck Tire Inspection

Fleet managers should take care to perform a tire inspection on a regularly scheduled basis. However, extra measures should be taken ahead of the winter months to ensure your tires last through the season. In particular, ensure the tread depth of each tire is at least 4/32” for steer tires and 2/32” for other tires. The deeper your tires’ tread, the safer your drivers will be when on icy, snowy roads.

In addition to the tread depth, ensure your tires aren’t suffering from uneven wear and tear or have excessive punctures, tears, or other visible damage. Check the sidewalls and be sure that each tire is properly inflated. During colder weather, tire pressure will drop and increase the risk for a blowout. Every 10-degree drop in temperature will lower the pressure in your tires by 1 psi. Decrease your risk of a blowout by ensuring your tire pressure is at the optimal level before, during, and after each winter driving trip.

Commercial Truck Tire Rotation

To avoid uneven wear and tear and provide your tires with better long-term traction, be sure to have your commercial truck tires rotated ahead of the winter season. Doing this can also help reduce fuel costs for your fleet, especially when performed at regularly scheduled intervals. One way fleet managers can continue to reap the benefits of regularly scheduled tire rotations all year long is by partnering with a preventative tire maintenance provider.